Canvas
Canvas widgets.
A canvas widget manages a 2D collection of graphical objects — lines, circles,
text, images, other widgets, and more.
Canvas widgets are part of the classic Tk widgets, not the themed Tk widgets.
Canvas widgets are created using the Canvas class:
canvas = Canvas(parent, width=500, height=400, background='gray75')Canvas widgets are created using the tk::canvas command:
tk::canvas .canvas -width 500 -height 400 -background gray75Canvas widgets are created using the TkCanvas class:
canvas = TkCanvas.new(parent) {width 500; height 400; background 'gray75'}Canvas widgets are created using the new_tk__canvas method, a.k.a. Tkx::tk__canvas:
$canvas = $parent->new_tk__canvas(-width => 500, -height => 400, -background => 'gray75');You'll often provide a width and height, either in pixels or any of the other standard distance units.
As always, you can ask the geometry manager to expand it to fill the available space in the window.
You might provide a default background color for the canvas, specifying colors as
you learned about in the last chapter. Canvas widgets also support other appearance options like relief and
borderwidth that we've used before.
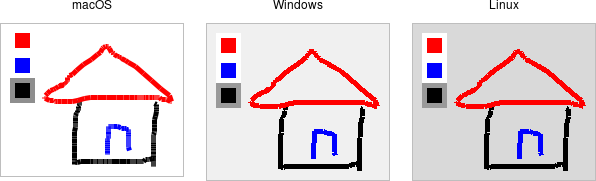
Canvas widgets have a tremendous number of features, and we won't cover everything here. Instead, we'll start with a simple example, a freehand sketching tool, and incrementally add new pieces, each showing another feature of canvas widgets.
Creating items
When you create a new canvas widget, it is essentially a large rectangle with nothing on it; truly a blank canvas, in other words. To do anything useful with it, you'll need to add items to it. There are a wide variety of different types of items you can add. Here, we'll add a simple line item to the canvas.
To create a line, you need to specify its starting and ending coordinates. Coordinates are expressed as the number of pixels away from the top-left corner, horizontally and vertically, i.e. (x,y). The pixel at the top-left corner, known as the origin, has coordinates (0,0). The "x" value increases as you move to the right, and the "y" value increases as you move down. A line is described by two points, which we'd refer to as (x0,y0) and (x1,y1). This code creates a line from (10,5) to (200,50):
canvas.create_line(10, 5, 200, 50)The create_line method returns an item id (an integer) that uniquely refers to this item.
We'll see how it can be used shortly.
Often, we don't need to refer to the item later and can ignore the returned id.
When specifying a set of coordinates for an item, you can provide them as individual arguments as we did here, or combine them into a single tuple or list argument,
e.g., canvas.create_line((10, 5, 200, 50)) or canvas.create_line([10, 5, 200, 50]).
.canvas create line 10 5 200 50The create line command returns an item id (an integer) that uniquely refers to this item.
We'll see how it can be used shortly.
Often, we don't need to refer to the item later and can ignore the returned id.
TkcLine.new( canvas, 10, 5, 200, 50)This command returns an item object representing the line. We'll see how it can be used shortly. Often, we don't need to refer to the item later, and can ignore the returned item object.
Internally, Tk refers to individual canvas items by a unique id, an integer starting at
1 and counting up for each object created. Ruby encapsulates this well inside item objects.
In some cases, as well as to understand much of the reference documentation, you'll need this
numeric id. You can retrieve it via the id method of a canvas item object.
$canvas->create_line(10,5,200,50);The create_line method returns an item id (an integer) that uniquely refers to this item.
We'll see how it can be used shortly.
Often, we don't need to refer to the item later and can ignore the returned id.
A simple sketchpad
Let's start our simple sketchpad example. For now, we'll implement freehand drawing on the canvas with the mouse. We create a canvas widget and attach event bindings to it to capture mouse clicks and drags. When the mouse is first pressed, we'll remember that location as the "start" of our next line. As the mouse is moved with the mouse button held down, we create a line item from this "start" position to the current mouse location. This current location becomes the "start" position for the next line item. Every mouse drag creates a new line item.
from tkinter import *
from tkinter import ttk

def savePosn(event):
    global lastx, lasty
    lastx, lasty = event.x, event.y

def addLine(event):
    canvas.create_line(lastx, lasty, event.x, event.y)
    savePosn(event)

root = Tk()
root.columnconfigure(0, weight=1)
root.rowconfigure(0, weight=1)

canvas = Canvas(root)
canvas.grid(column=0, row=0, sticky=(N, W, E, S))
canvas.bind("<Button-1>", savePosn)
canvas.bind("<B1-Motion>", addLine)

root.mainloop()
In this simple example, we're using global variables to store the start position. In practice, we'd encapsulate all of this in a Python
class. Here's one way we could do that. Note that this example creates a subclass of Canvas, which is treated like
any other widget in the code. We could have equally well used a standalone class, as we did with the "feet to meters" example.
from tkinter import *
from tkinter import ttk

class Sketchpad(Canvas):
    def __init__(self, parent, **kwargs):
        super().__init__(parent, **kwargs)
        self.bind("<Button-1>", self.save_posn)
        self.bind("<B1-Motion>", self.add_line)

    def save_posn(self, event):
        self.lastx, self.lasty = event.x, event.y

    def add_line(self, event):
        self.create_line(self.lastx, self.lasty, event.x, event.y)
        self.save_posn(event)

root = Tk()
root.columnconfigure(0, weight=1)
root.rowconfigure(0, weight=1)

sketch = Sketchpad(root)
sketch.grid(column=0, row=0, sticky=(N, W, E, S))

root.mainloop()
package require Tk
grid [tk::canvas .canvas] -sticky nwes -column 0 -row 0
grid columnconfigure . 0 -weight 1
grid rowconfigure . 0 -weight 1
bind .canvas <1> "set lastx %x; set lasty %y"
bind .canvas <B1-Motion> "addLine %x %y"
proc addLine {x y} {
.canvas create line $::lastx $::lasty $x $y
set ::lastx $x; set ::lasty $y
}require 'tk'
root = TkRoot.new()
$canvas = TkCanvas.new(root)
$canvas.grid :sticky => 'nwes', :column => 0, :row => 0
TkGrid.columnconfigure( root, 0, :weight => 1 )
TkGrid.rowconfigure( root, 0, :weight => 1 )
$canvas.bind( "1", proc{|x,y| @lastx = x; @lasty = y}, "%x %y")
$canvas.bind( "B1-Motion", proc{|x, y| addLine(x,y)}, "%x %y")
def addLine (x,y)
TkcLine.new( $canvas, @lastx, @lasty, x, y )
@lastx = x; @lasty = y;
end
Tk.mainloopuse Tkx;
$mw = Tkx::widget->new(".");
$canvas = $mw->new_tk__canvas;
$canvas->g_grid(-column=>0, -row=>0, -sticky=>"nwes");
$mw->g_grid_columnconfigure(0, -weight=>1);
$mw->g_grid_rowconfigure(0, -weight=>1);
$canvas->g_bind("<1>", [sub {my ($x,$y) = @_; $lastx=$x; $lasty=$y}, Tkx::Ev("%x","%y")]);
$canvas->g_bind("<B1-Motion>", [sub {my ($x,$y) = @_; addLine($x,$y)}, Tkx::Ev("%x","%y")]);
sub addLine {
my ($x,$y) = @_;
$canvas->create_line($lastx,$lasty,$x,$y);
$lastx = $x; $lasty = $y;
}
Tkx::MainLoop();Try it out - drag the mouse around the canvas to create your masterpiece.
Item attributes
When creating items, you can also specify one or more item attributes, affecting how it appears. For example, we can specify that the line should be red and three pixels wide.
canvas.create_line(10, 10, 200, 50, fill='red', width=3).canvas create line 10 10 200 50 -fill red -width 3TkcLine.new( canvas, 10, 10, 200, 50, :fill => 'red', :width => 3)$canvas->create_line(10, 10, 200, 50, -fill => "red", -width => 3);The exact set of attributes will vary according to the type of item. Some commonly used ones are:
fill:- color to draw the object
width:- line width of the item (or its outline)
outline:- for filled shapes like rectangles, the color to draw the item's outline
dash:- draw a dashed line instead of a solid one, e.g.,
2 4 6 4alternates short (2 pixels) and long (6 pixels) dashes with 4 pixels between stipple:- instead of a solid fill color, use a pattern, typically
gray75,gray50,gray25, orgray12; stippling is currently not supported on macOS state:- assign a state of
normal(default),disabled(item event bindings are ignored), orhidden(removed from display) disabledfill, disabledwidth, ...:- if the item's
stateis set todisabled, the item will display using these variants of the usual attributes activefill, activewidth, ...:- when the mouse pointer is over the item, it will display using these variants of the usual attributes
If you have canvas items that change state, creating the item with both the regular and disabled* attribute variants can simplify your code.
You simply need to change the item's state rather than writing code to change multiple display attributes.
The same applies to the active* attribute variants. Both encourage a more declarative style that can remove a lot of boilerplate code.
Just like with Tk widgets, you can change the attributes of canvas items after they're created, or retrieve the current value of an attribute.
id = canvas.create_line(0, 0, 10, 10, fill='red')
...
canvas.itemconfigure(id, fill='blue', width=2)
print(canvas.itemcget(id, 'fill'))
set id [.canvas create line 0 0 10 10 -fill red]
...
.canvas itemconfigure $id -fill blue -width 2
puts [.c itemcget $id -fill]line = TkcLine.new( canvas, 0, 0, 10, 10, :fill => 'red' )
line[:fill] = 'blue'
line[:width] = 2
print line[:fill]$id = $canvas->create_line(0, 0, 10, 10, -fill => "red");
...
$canvas->itemconfigure($id, -fill => "blue", -width => 2);
print($canvas->itemcget($id, -fill));Item types
Canvas widgets support a wide variety of item types.
Line
Our sketchpad created simple line items, each a single segment with a start point and an end point. Lines items can also consist of multiple segments.
canvas.create_line(10, 10, 200, 50, 90, 150, 50, 80).canvas create line 10 10 200 50 90 150 50 80TkcLine.new( canvas, 10, 10, 200, 50, 90, 150, 50, 80)$canvas->create_line(10, 10, 200, 50, 90, 150, 50, 80);Lines have several interesting additional attributes, allowing for drawing curves, arrows, and more.
arrow:- place an arrowhead at the start (
first), end (last), or both ends (both); default isnone arrowshape:- allows changing the appearance of any arrowheads
capstyle:- for wide lines without arrowheads, this controls how the end of lines are drawn; one of
butt(default),projecting, orround joinstyle:- for wide lines with multiple segments, this controls drawings of each vertex; one of
round(default),bevel, ormiter smooth:- if specified as
true(orbezier), draws a smooth curve (via quadratic splines) between multiple segments rather than using straight lines;rawspecifies a different type of curve (cubic splines) splinesteps:- controls the smoothness of curved lines, i.e., those with the
smoothoption set
Rectangle
Rectangles are specified by the coordinates of opposing corners, e.g., top-left and bottom-right. They can be filled in (via fill) with one color,
and the outline given a different color.
canvas.create_rectangle(10, 10, 200, 50, fill='red', outline='blue').canvas create rectangle 10 10 200 50 -fill red -outline blueTkcRectangle.new( canvas, 10, 10, 200, 50, :fill => 'red', :outline => 'blue')$canvas->create_rectangle(10, 10, 200, 50, -fill => "red", -outline => "blue");Oval
Ovals items work exactly the same as rectangles.
canvas.create_oval(10, 10, 200, 150, fill='red', outline='blue').canvas create oval 10 10 200 50 -fill red -outline blueTkcOval.new( canvas, 10, 10, 200, 150, :fill => 'red', :outline => 'blue')$canvas->create_oval(10, 10, 200, 150, -fill => "red", -outline => "blue");Polygon
Polygon items allow you to create arbitrary shapes as defined by a series of points. The coordinates are given in the same way as multipoint lines.
Tk ensures the polygon is "closed," attaching the last point to the first if needed. Like ovals and rectangles, they can have separate
fill and outline colors. They also support the joinstyle, smooth, and splinesteps
attributes of line items.
canvas.create_polygon(10, 10, 200, 50, 90, 150, 50, 80, 120, 55, fill='red', outline='blue').canvas create polygon 10 10 200 50 90 150 50 80 120 55 -fill red -outline blueTkcPolygon.new( canvas, 10, 10, 200, 50, 90, 150, 50, 80, 120, 55, :fill => 'red', :outline => 'blue')$canvas->create_polygon(10, 10, 200, 50, 90, 150, 50, 80, 120, 55, -fill => "red", -outline => "blue"Arc
Arc items draw a portion of an oval; think of one piece of a pie chart. Its display is controlled by three attributes:
start: how far along the oval the arc should start, in degrees (0 is the 3-o'clock position)- The
extent: how many degrees "wide" the arc should be, positive for counter-clockwise from the start, negative for clockwise style: one ofpieslice(the default),arc(draws just the outer perimeter), orchord(draws the area between a line connecting the start and end points of the arc and the outer perimeter).
canvas.create_arc(10, 10, 200, 150, fill='yellow', outline='black', start=45, extent=135, width=5).canvas create arc 10 10 200 50 -fill yellow -outline black -start 45 -extent 135 -width 5TkcArc.new( canvas, 10, 10, 200, 150, :fill => 'yellow', :outline => 'black', :start => 45, :extent => 135, :width => 5)$canvas->create_arc(10, 10, 200, 150, -fill => "yellow", -outline => "black", -start => 45, -extent => 135, -width => 5);Image
Image items can display arbitrary images. By default, the item is centered at the coordinates you specify, but this can be changed with the anchor
option, e.g., nw means the coordinates are where to put the top-left of the image.
myimg = PhotoImage(file='pretty.png')
canvas.create_image(10, 10, image=myimg, anchor='nw')
image create photo myimg -file pretty.png
.canvas create image 10 10 -image myimg -anchor nwmyimg = TkPhotoImage.new(:file => "pretty.png")
TkcImage.new( canvas, 10, 10, :image => myimg, :anchor => "nw")$im = Tkx::image_create_photo("myimg", -file => "pretty.png");
$canvas->create_image( 10, 10, -image => $im, -anchor => "nw");There's also a bitmap item type for images having only two colors, which can be changed via foreground and background.
They're not commonly used these days.
Text
Text items can display a block of text. Positioning the text works the same as with image items.
Specify the text to display using the text attribute.
All of the text in the item will have the same color (specified by the fill attribute) and the same font (specified by a font attribute).
The text item can display multiple lines of text if you embed \n in the text.
Alternatively, you can have the item automatically wrapped into multiple lines by providing a width attribute to represent the maximum width of a line.
The alignment of multiple lines of text can be set using the justify attribute, which can be one of left (the default), right,
or center.
canvas.create_text(100, 100, text='A wonderful story', anchor='nw', font='TkMenuFont', fill='red').canvas create text 100 100 -text "A wonderful story" -anchor nw -font TkMenuFont -fill redTkcText.new( canvas, 100, 100, :text => 'A wonderful story', :anchor => 'nw', font => 'TkMenuFont', :fill => 'red')$canvas->create_text(100, 100, -text => "A wonderful story", -anchor => "nw", -font => "TkMenuFont", -fill => "red");Widget
One of the coolest things you can do with the canvas widget is embed other widgets inside it. This can be a lowly button, an entry (think in-place
editing of text items), a listbox, a frame itself containing a complex set of widgets... anything! Remember when we said way back when that a canvas widget
could act as a geometry manager? This is what we meant. You're adding these other widgets to your user interface using the canvas instead of using grid.
Canvas items that display other widgets are known as window items (Tk's longstanding terminology for widgets). They are positioned like text and image items.
You can give them explicit width and height attributes; they default to the widget's preferred size. Finally, it's important that
the widget you're placing on the canvas (via the window) attribute be a child widget of the canvas.
b = ttk.Button(canvas, text='Implode!')
canvas.create_window(10, 10, anchor='nw', window=b)
ttk::button .canvas.b -text "Implode!"
.canvas create window 10 10 -anchor nw -window .canvas.bb = Tk::Tile::Button.new(canvas) {text 'Implode!'}
TkcWindow.new( canvas, 10, 10, :anchor => "nw", :window => b)$b = $canvas->new_ttk__button(-text => "Implode!");
$canvas->create_window( 10, 10, -anchor => "nw", -window => $b);Modifying items
We've seen how you can modify the configuration options on an item — its color, width, etc. There are several other things you can do with items.
To delete items, use the delete method.
To change an item's size and position, you can use the coords method. You supply
new coordinates for the item, specified the same way as when you first created it. Calling this method
without a new set of coordinates will return the current coordinates of the item. You can use the move
method to offset one or more items
horizontally or vertically from their current position.
All items are ordered from top to bottom in what's called the stacking order. If an item later in the
stacking order overlaps an item below it, the first item will be drawn on top of the second.
The raise (lift in Tkinter)
and lower methods allow you to adjust an item's position in the stacking order.
There are several more operations detailed in the reference manual to modify items and retrieve information about them.
Event bindings
We've already seen that the canvas widget as a whole, like any other Tk widget, can capture events
using the bind command.
You can also attach bindings to individual items in the canvas (or groups of them, as we'll see in the next section using tags). So if you want to know whether or not a particular item has been clicked on, you don't need to watch for mouse click events for the canvas as a whole and then figure out if that click happened on your item. Tk will take care of all this for you.
To capture these events, you use a bind command built into the canvas. It works exactly like the regular bind command, taking an event pattern and a callback. The only difference is you specify the canvas item this binding applies to.
canvas.tag_bind(id, '<1>', ...)Note the difference between the item-specific tag_bind method
and the widget-level bind method.
.canvas bind $id <1> {...}line.bind("1", ...)$canvas->bind($id, "<1>", sub{...});Note the difference between the item-specific bind method and the
widget-level g_bind method.
Let's add some code to our sketchpad example to allow changing the drawing color. We'll first create a few different rectangle items, each filled with a different color. We'll then attach a binding to each of these. When they're clicked on, they'll set a global variable to the new drawing color. Our mouse motion binding will look at that variable when creating the line segments.
color = "black"
def setColor(newcolor):
    global color
    color = newcolor

def addLine(event):
    global lastx, lasty
    canvas.create_line(lastx, lasty, event.x, event.y, fill=color)
    lastx, lasty = event.x, event.y

id = canvas.create_rectangle(10, 10, 30, 30, fill="red")
canvas.tag_bind(id, "<Button-1>", lambda x: setColor("red"))
id = canvas.create_rectangle(10, 35, 30, 55, fill="blue")
canvas.tag_bind(id, "<Button-1>", lambda x: setColor("blue"))
id = canvas.create_rectangle(10, 60, 30, 80, fill="black")
canvas.tag_bind(id, "<Button-1>", lambda x: setColor("black"))
set id [.canvas create rectangle 10 10 30 30 -fill red]
.canvas bind $id <1> "setColor red"
set id [.canvas create rectangle 10 35 30 55 -fill blue]
.canvas bind $id <1> "setColor blue"
set id [.canvas create rectangle 10 60 30 80 -fill black]
.canvas bind $id <1> "setColor black"
set ::color black
proc setColor {color} {
set ::color $color
}
proc addLine {x y} {
.canvas create line $::lastx $::lasty $x $y -fill $::color
set ::lastx $x; set ::lasty $y
}r = TkcRectangle.new( $canvas, 10, 10, 30, 30, :fill => 'red')
r.bind( "1", proc {setColor('red')})
r = TkcRectangle.new( $canvas, 10, 35, 30, 55, :fill => 'blue')
r.bind( "1", proc {setColor('blue')})
r = TkcRectangle.new( $canvas, 10, 60, 30, 80, :fill => 'black')
r.bind( "1", proc {setColor('black')})
@color = 'black'
def setColor color
@color = color
end
def addLine (x,y)
TkcLine.new( $canvas, @lastx, @lasty, x, y, :fill => @color )
@lastx = x; @lasty = y;
end$canvas->g_bind("<1>", [sub {my ($x,$y) = @_; $lastx=$x; $lasty=$y}, Tkx::Ev("%x","%y")]);
$canvas->g_bind("<B1-Motion>", [sub {my ($x,$y) = @_; addLine($x,$y)}, Tkx::Ev("%x","%y")]);
$id = $canvas->create_rectangle(10, 10, 30, 30, -fill => "red");
$canvas->bind($id, "<1>", sub {setColor("red")});
$id = $canvas->create_rectangle(10, 35, 30, 55, -fill => "blue");
$canvas->bind($id, "<1>", sub {setColor("blue")});
$id = $canvas->create_rectangle(10, 60, 30, 80, -fill => "black");
$canvas->bind($id, "<1>", sub {setColor("black")});
$color = "black";
sub setColor {
my ($newcolor) = @_;
$color = $newcolor;
}
sub addLine {
my ($x,$y) = @_;
$canvas->create_line($lastx,$lasty,$x,$y, -fill => $color);
$lastx = $x; $lasty = $y;
}Tags
We've seen that every canvas item can be referred to by a unique id number. There is another handy and powerful way to refer to items on a canvas, using tags.
A tag is just an identifier of your creation, something meaningful to your program. You can attach tags to canvas items; each item can have any number of tags. Unlike item id numbers, which are unique for each item, many items can share the same tag.
What can you do with tags? We saw that you can use the item id to modify a canvas item (and we'll see soon there are other things you can do to items, like move them around, delete them, etc.). Any time you can use an item id, you can use a tag. For example, you can change the color of all items having a specific tag.
Tags are a good way to identify collections of items in your canvas (items in a drawn line, items in a palette, etc.). You can use tags to correlate canvas items to particular objects in your application (for example, tag all canvas items that are part of the robot with id #X37 with the tag "robotX37"). With tags, you don't have to keep track of the ids of canvas items to refer to groups of items later; tags let Tk do that for you.
You can assign tags when creating an item using the tags item configuration option. You
can add tags later with the addtag method or remove them with the dtags method.
You can get the list of tags for an item with the gettags method or return a list of item
id numbers having the given tag with the find command.
For example:
>>> c = Canvas(root)
>>> c.create_line(10, 10, 20, 20, tags=('firstline', 'drawing'))
1
>>> c.create_rectangle(30, 30, 40, 40, tags=('drawing'))
2
>>> c.addtag('rectangle', 'withtag', 2)
>>> c.addtag('polygon', 'withtag', 'rectangle')
>>> c.gettags(2)
('drawing', 'rectangle', 'polygon')
>>> c.dtag(2, 'polygon')
>>> c.gettags(2)
('drawing', 'rectangle')
>>> c.find_withtag('drawing')
(1, 2)
% canvas .c
.c
% .c create line 10 10 20 20 -tags "firstline drawing"
1
% .c create rectangle 30 30 40 40 -tags "drawing"
2
% .c addtag rectangle withtag 2
% .c addtag polygon withtag rectangle
% .c gettags 2
drawing rectangle polygon
% .c dtag 2 polygon
% .c gettags 2
drawing rectangle
% .c find withtag drawing
1 2
>> canvas = TkCanvas.new root
=> #<TkCanvas:0x73c92c @path=".w00000">l
>> l = TkcLine.new canvas, 10, 10, 20, 20, :tags => 'firstline drawing'
=> #<TkcLine:0x737990 @id=1, @parent=#<TkCanvas:0x73c92c @path=".w00000">,
         @path=".w00000", @c=#<TkCanvas:0x73c92c @path=".w00000">>
>> r = TkcRectangle.new canvas, 30, 30, 40, 40, :tags => 'drawing'
=> #<TkcRectangle:0x732b34 @id=2, @parent=#<TkCanvas:0x73c92c @path=".w00000">,
         @path=".w00000", @c=#<TkCanvas:0x73c92c @path=".w00000">>
>> r.addtag 'rectangle'
=> #<TkcRectangle:0x732b34 @id=2, ... >
>> canvas.addtag 'polygon', :withtag, 'rectangle'
=> <TkCanvas:0x73c92c @path=".w00000">
>> canvas.gettags r
=> ["drawing", "rectangle", "polygon"]
>> r.dtag 'polygon'
=> #<TkcRectangle:0x732b34 @id=2 ... >
>> r.gettags
=> ["drawing", "rectangle"]
>> canvas.find :withtag, 'drawing'
=> [#<TkcLine:0x737990 @id=1 ... >, #<TkcRectangle:0x732b34 @id=2 ... >]
Perl> $c = $mw->new_canvas()
.c
Perl> $c->create_line(10, 10, 20, 20, -tags => "firstline drawing")
1
Perl> $c->create_rectangle(30,30,40,40, -tags => "drawing")
2
Perl> $c->addtag("rectangle", "withtag", 2)
Perl> $c->addtag("polygon", "withtag", "rectangle")
Perl> $c->gettags(2)
drawing rectangle polygon
Perl> $c->dtag(2,"polygon")
Perl> $c->gettags(2)
drawing rectangle
Perl> $c->find_withtag("drawing")
1 2
As you can see, methods like withtag accept either an individual item or a tag; in the latter
case, they will apply to all items having that tag (which could be none). The addtag
and find methods have many other options, allowing you to specify items near a point, overlapping
a particular area, etc.
Let's use tags first to put a border around whichever item in our color palette is currently selected.
def setColor(newcolor):
    global color
    color = newcolor
    canvas.dtag('all', 'paletteSelected')
    canvas.itemconfigure('palette', outline='white')
    canvas.addtag('paletteSelected', 'withtag', 'palette%s' % color)
    canvas.itemconfigure('paletteSelected', outline='#999999')

id = canvas.create_rectangle(10, 10, 30, 30, fill="red", tags=('palette', 'palettered'))
id = canvas.create_rectangle(10, 35, 30, 55, fill="blue", tags=('palette', 'paletteblue'))
id = canvas.create_rectangle(10, 60, 30, 80, fill="black", tags=('palette', 'paletteblack', 'paletteSelected'))

setColor('black')
canvas.itemconfigure('palette', width=5)
set id [.canvas create rectangle 10 10 30 30 -fill red -tags "palette palettered"]
set id [.canvas create rectangle 10 35 30 55 -fill blue -tags "palette paletteblue"]
set id [.canvas create rectangle 10 60 30 80 -fill black -tags "palette paletteblack paletteSelected"]
proc setColor {color} {
set ::color $color
.canvas dtag all paletteSelected
.canvas itemconfigure palette -outline white
.canvas addtag paletteSelected withtag palette$color
.canvas itemconfigure paletteSelected -outline #999999
}
setColor black
.canvas itemconfigure palette -width 5r = TkcRectangle.new( $canvas, 10, 10, 30, 30, :fill => 'red', :tags => 'palette palettered')
r = TkcRectangle.new( $canvas, 10, 35, 30, 55, :fill => 'blue', :tags => 'palette paletteblue')
r = TkcRectangle.new( $canvas, 10, 60, 30, 80, :fill => 'black', :tags => 'palette paletteblack paletteSelected')
def setColor color
@color = color
$canvas.dtag 'all', 'paletteSelected'
$canvas.itemconfigure 'palette', :outline => 'white'
$canvas.addtag 'paletteSelected', :withtag, "palette#{color}"
$canvas.itemconfigure 'paletteSelected', :outline => '#999999'
end
setColor 'black'
$canvas.itemconfigure 'palette', :width => 5The canvas itemconfigure method provides another way to change the properties of a canvas item.
The advantage over dealing with the canvas item object directly is that we can specify a tag, so that the
change we're making applies to all items having that tag. Without this, we could use gettags
to get all the items, iterate through them, and set the option, but itemconfigure is more convenient.
$id = $canvas->create_rectangle(10, 10, 30, 30, -fill => "red", -tags => "palette palettered");
$id = $canvas->create_rectangle(10, 35, 30, 55, -fill => "blue", -tags => "palette paletteblue");
$id = $canvas->create_rectangle(10, 60, 30, 80, -fill => "black", -tags => "palette paletteblack paletteSelected");

sub setColor {
    my ($newcolor) = @_;
    $color = $newcolor;
    $canvas->dtag_all("paletteSelected");
    $canvas->itemconfigure("palette", -outline => "white");
    $canvas->addtag("paletteSelected", withtag => "palette".$color);
    $canvas->itemconfigure("paletteSelected", -outline => "#999999");
}
setColor "black";
$canvas->itemconfigure("palette", -width => 5);
Let's also use tags to make the current stroke being drawn appear more prominent. When the mouse button is released, we'll return the line to normal.
def addLine(event):
    global lastx, lasty
    canvas.create_line(lastx, lasty, event.x, event.y, fill=color, width=5, tags='currentline')
    lastx, lasty = event.x, event.y

def doneStroke(event):
    canvas.itemconfigure('currentline', width=1)

canvas.bind("<B1-ButtonRelease>", doneStroke)
bind .canvas <B1-ButtonRelease> "doneStroke"
proc addLine {x y} {
.canvas create line $::lastx $::lasty $x $y -fill $::color -width 5 -tags currentline
set ::lastx $x; set ::lasty $y
}
proc doneStroke {} {
.canvas itemconfigure currentline -width 1
}$canvas.bind( "B1-ButtonRelease", proc{doneStroke})
def addLine (x,y)
TkcLine.new( $canvas, @lastx, @lasty, x, y, :fill => @color, :width => 5, :tags => 'currentline' )
@lastx = x; @lasty = y;
end
def doneStroke
$canvas.itemconfigure 'currentline', :width => 1
end$canvas->g_bind("<B1-ButtonRelease>", sub {doneStroke();});
sub addLine {
my ($x,$y) = @_;
$canvas->create_line($lastx,$lasty,$x,$y, -fill => $color, -width => 5, -tags => "currentline");
$lastx = $x; $lasty = $y;
}
sub doneStroke {
$canvas->itemconfigure("currentline", -width => 1);
}Scrolling
In many applications, you'll want the canvas to be larger than what appears on the screen. You can attach
horizontal and vertical scrollbars to the canvas in the usual way via the xview and yview
methods.
You can specify both how large you'd like it to be on screen and its full size (which would require scrolling to see).
The width and height configuration options control how much space the canvas widget requests
from the geometry manager. The scrollregion configuration option tells Tk how large the canvas surface is by
specifying its left, top, right, and bottom coordinates, e.g., 0 0 1000 1000.
You should be able to modify the sketchpad program to add scrolling, given what you already know. Give it a try.
Once you've done that, scroll the canvas down just a little bit, and then try drawing. You'll see that the line you're drawing appears above where the mouse is pointing! Surprised?
What's going on is that the global bind command doesn't know that the canvas is scrolled (it doesn't
know the details of any particular widget). So if you've scrolled the canvas down by 50 pixels, and you click
on the top left corner, bind will report that you've clicked at (0,0). But we know that because of the scrolling,
that position should really be (0,50).
The canvasx and canvasy methods translate the position onscreen (which bind reports)
into the actual point on the canvas (taking into account scrolling).
Be careful if you're adding canvasx and canvasy methods directly to the event binding scripts.
You need to watch the quoting and substitutions to ensure the conversions are done when the event fires.
As always, it's better to place that code in a procedure separate from the event binding itself.
Here then, is our complete example. We probably don't want the palette to be scrolled away when the canvas is scrolled, but we'll leave that for another day.
from tkinter import *
from tkinter import ttk
root = Tk()

h = ttk.Scrollbar(root, orient=HORIZONTAL)
v = ttk.Scrollbar(root, orient=VERTICAL)
canvas = Canvas(root, scrollregion=(0, 0, 1000, 1000), yscrollcommand=v.set, xscrollcommand=h.set)
h['command'] = canvas.xview
v['command'] = canvas.yview

canvas.grid(column=0, row=0, sticky=(N,W,E,S))
h.grid(column=0, row=1, sticky=(W,E))
v.grid(column=1, row=0, sticky=(N,S))
root.grid_columnconfigure(0, weight=1)
root.grid_rowconfigure(0, weight=1)

lastx, lasty = 0, 0

def xy(event):
    global lastx, lasty
    lastx, lasty = canvas.canvasx(event.x), canvas.canvasy(event.y)

def setColor(newcolor):
    global color
    color = newcolor
    canvas.dtag('all', 'paletteSelected')
    canvas.itemconfigure('palette', outline='white')
    canvas.addtag('paletteSelected', 'withtag', 'palette%s' % color)
    canvas.itemconfigure('paletteSelected', outline='#999999')

def addLine(event):
    global lastx, lasty
    x, y = canvas.canvasx(event.x), canvas.canvasy(event.y)
    canvas.create_line(lastx, lasty, x, y, fill=color, width=5, tags='currentline')
    lastx, lasty = x, y

def doneStroke(event):
    canvas.itemconfigure('currentline', width=1)

canvas.bind("<Button-1>", xy)
canvas.bind("<B1-Motion>", addLine)
canvas.bind("<B1-ButtonRelease>", doneStroke)

id = canvas.create_rectangle(10, 10, 30, 30, fill="red", tags=('palette', 'palettered'))
canvas.tag_bind(id, "<Button-1>", lambda x: setColor("red"))
id = canvas.create_rectangle(10, 35, 30, 55, fill="blue", tags=('palette', 'paletteblue'))
canvas.tag_bind(id, "<Button-1>", lambda x: setColor("blue"))
id = canvas.create_rectangle(10, 60, 30, 80, fill="black", tags=('palette', 'paletteblack', 'paletteSelected'))
canvas.tag_bind(id, "<Button-1>", lambda x: setColor("black"))

setColor('black')
canvas.itemconfigure('palette', width=5)
root.mainloop()
package require Tk
grid [tk::canvas .canvas -scrollregion "0 0 1000 1000" -yscrollcommand ".v set" -xscrollcommand ".h set"] -sticky nwes -column 0 -row 0
grid columnconfigure . 0 -weight 1
grid rowconfigure . 0 -weight 1
grid [ttk::scrollbar .h -orient horizontal -command ".canvas xview"] -column 0 -row 1 -sticky we
grid [ttk::scrollbar .v -orient vertical -command ".canvas yview"] -column 1 -row 0 -sticky ns
bind .canvas <1> {set lastx [.canvas canvasx %x]; set lasty [.canvas canvasy %y]}
bind .canvas <B1-Motion> {addLine [.canvas canvasx %x] [.canvas canvasy %y]}
bind .canvas <B1-ButtonRelease> "doneStroke"
set id [.canvas create rectangle 10 10 30 30 -fill red -tags "palette palettered"]
.canvas bind $id <1> "setColor red"
set id [.canvas create rectangle 10 35 30 55 -fill blue -tags "palette paletteblue"]
.canvas bind $id <1> "setColor blue"
set id [.canvas create rectangle 10 60 30 80 -fill black -tags "palette paletteblack paletteSelected"]
.canvas bind $id <1> "setColor black"
proc setColor {color} {
set ::color $color
.canvas dtag all paletteSelected
.canvas itemconfigure palette -outline white
.canvas addtag paletteSelected withtag palette$color
.canvas itemconfigure paletteSelected -outline #999999
}
proc addLine {x y} {
.canvas create line $::lastx $::lasty $x $y -fill $::color -width 5 -tags currentline
set ::lastx $x; set ::lasty $y
}
proc doneStroke {} {
.canvas itemconfigure currentline -width 1
}
setColor black
.canvas itemconfigure palette -width 5require 'tk'
require 'tkextlib/tile'
root = TkRoot.new()
$canvas = TkCanvas.new(root) {scrollregion '0 0 1000 1000'}
$h = Tk::Tile::Scrollbar.new(root) {orient 'horizontal'; command proc{|*args| $canvas.xview(*args);}}
$v = Tk::Tile::Scrollbar.new(root) {orient 'vertical'; command proc{|*args| $canvas.yview(*args);}}
$canvas['xscrollcommand'] = proc{|*args| $h.set(*args);}
$canvas['yscrollcommand'] = proc{|*args| $v.set(*args);}
$canvas.grid :sticky => 'nwes', :column => 0, :row => 0
$h.grid :sticky => 'we', :column => 0, :row => 1
$v.grid :sticky => 'ns', :column => 1, :row => 0
TkGrid.columnconfigure( root, 0, :weight => 1 )
TkGrid.rowconfigure( root, 0, :weight => 1 )
$canvas.bind( "1", proc{|x,y| @lastx = $canvas.canvasx(x); @lasty = $canvas.canvasy(y)}, "%x %y")
$canvas.bind( "B1-Motion", proc{|x, y| addLine($canvas.canvasx(x), $canvas.canvasy(y))}, "%x %y")
$canvas.bind( "B1-ButtonRelease", proc{doneStroke})
r = TkcRectangle.new( $canvas, 10, 10, 30, 30, :fill => 'red', :tags => 'palette palettered')
r.bind( "1", proc {setColor('red')})
r = TkcRectangle.new( $canvas, 10, 35, 30, 55, :fill => 'blue', :tags => 'palette paletteblue')
r.bind( "1", proc {setColor('blue')})
r = TkcRectangle.new( $canvas, 10, 60, 30, 80, :fill => 'black', :tags => 'palette paletteblack paletteSelected')
r.bind( "1", proc {setColor('black')})
$canvas.itemconfigure 'palette', :width => 5
def setColor color
@color = color
$canvas.dtag 'all', 'paletteSelected'
$canvas.itemconfigure 'palette', :outline => 'white'
$canvas.addtag 'paletteSelected', :withtag, "palette#{color}"
$canvas.itemconfigure 'paletteSelected', :outline => '#999999'
end
setColor 'black'
def addLine (x,y)
TkcLine.new( $canvas, @lastx, @lasty, x, y, :fill => @color, :width => 5, :tags => 'currentline' )
@lastx = x; @lasty = y;
end
def doneStroke
$canvas.itemconfigure 'currentline', :width => 1
end
Tk.mainloopuse Tkx;
$mw = Tkx::widget->new(".");
$canvas = $mw->new_tk__canvas(-scrollregion => "0 0 1000 1000");
$canvas->g_grid(-column=>0, -row=>0, -sticky=>"nwes");
$mw->g_grid_columnconfigure(0, -weight=>1);
$mw->g_grid_rowconfigure(0, -weight=>1);
$hscroll = $mw->new_ttk__scrollbar(-orient => "horizontal", -command => [$canvas, "xview"]);
$vscroll = $mw->new_ttk__scrollbar(-orient => "vertical", -command => [$canvas, "yview"]);
$hscroll->g_grid(-column => 0, -row => 1, -sticky => "we");
$vscroll->g_grid(-column => 1, -row => 0, -sticky => "ns");
$canvas->configure(-yscrollcommand => [$vscroll, "set"], -xscrollcommand => [$hscroll, "set"]);
$canvas->g_bind("<1>", [sub {my ($x,$y) = @_; $lastx=$canvas->canvasx($x); $lasty=$canvas->canvasy($y)}, Tkx::Ev("%x","%y")]);
$canvas->g_bind("<B1-Motion>", [sub {my ($x,$y) = @_; addLine($canvas->canvasx($x),$canvas->canvasy($y))}, Tkx::Ev("%x","%y")]);
$canvas->g_bind("<B1-ButtonRelease>", sub {doneStroke();});
$id = $canvas->create_rectangle(10, 10, 30, 30, -fill => "red", -tags => "palette palettered");
$canvas->bind($id, "<1>", sub {setColor("red")});
$id = $canvas->create_rectangle(10, 35, 30, 55, -fill => "blue", -tags => "palette paletteblue");
$canvas->bind($id, "<1>", sub {setColor("blue")});
$id = $canvas->create_rectangle(10, 60, 30, 80, -fill => "black", -tags => "palette paletteblack paletteSelected");
$canvas->bind($id, "<1>", sub {setColor("black")});
sub setColor {
my ($newcolor) = @_;
$color = $newcolor;
$canvas->dtag_all("paletteSelected");
$canvas->itemconfigure("palette", -outline => "white");
$canvas->addtag("paletteSelected", withtag => "palette".$color);
$canvas->itemconfigure("paletteSelected", -outline => "#999999");
}
setColor "black";
$canvas->itemconfigure("palette", -width => 5);
sub addLine {
my ($x,$y) = @_;
$canvas->create_line($lastx,$lasty,$x,$y, -fill => $color, -width => 5, -tags => "currentline");
$lastx = $x; $lasty = $y;
}
sub doneStroke {
$canvas->itemconfigure("currentline", -width => 1);
}
Tkx::MainLoop();